Murphy's Law (for those of you who don't know Murphy, look HERE ) stepped in today and prevented us from completing our punchlist (hey 2/3 done ain't bad, though). However, the close to 30 minutes we spent on extracting and replacing a bent shaft in our arm joint was a good thing as this was most likely the cause of our broken gear tooth on the other side of our arm earlier in the build. I like knowing root causes of failures, and I'm thrilled we learned this now as opposed to on the field of play.
Thus, we have no spectacular video to show just yet. However, I will say I'm excited at the promise this newborn is showing and we did get far enough along today to show you these pics and can tell you her name is Kwelaha, which is "Hope" in Lenape language. See HERE for pronunciation. You can also take a look at our flickr page for updated photos. Enjoy and see you with video and more in the next week or two. For our friends on the East Coast, stay dry this weekend!
-Kressly
Sometimes things go as expected, even in competition robot development. The August 23rd meeting was our smoothest yet. We were able to transition fully to VEXnet control (woooo for fund raising!), practice driving the "whole" robot (accumulator arm not ready to run full-blown quite yet) using the VEXnet joystick (sweet), accomplish optimization of our surgical tubing assist while also making it easy to disconnect in seconds to work on arm joints as necessary, added one of the two additional motors to our arm lift joint (the other arrived UPS after the meeting), decided there was no need to take mass out of our already very thin polycarbonate sheets (that tubing and added motors ROCK!), and we were able to create a driver-control programming schematic, get it all successfully programmed in EasyCv4 for Cortex, and after two sets of bench tests and one set of tweaks - reversing a few motor channels - everything operates as it is intended in driver control mode!
We'll be updating our Flickr account and our Youtube Channel in the next few days to provide more visuals for you all, but for now here's our punchlist for mechanical "completion" of 1414's first ever robot. A list we hope to complete Friday:
1. add hard stops to arm lifts
2. add soft/spring stop to accumulator
3. mount number plates
4. mount graphics
5. mount flag holders
6. mount final motor
7. finish motor and wire labeling
8. remove temp electronics mount and replace with final mount
9. Find loose connection for one of our drive motors and retape it
10. Make sure no drive shafts are protruding from chassis
11. Add angled tower supports
12. Mount graphics
13. Ensure current tubing assist allows for match starting position of arm
14. File sharp edges
With similar good fortune next time we should see the robot score her first game object on our practice field Friday!
Building a competition robot, especially object manipulators can be frustrating and slow at times. Also reminding the team that we're committed to doing all we can to develop ERB (expected repeatable behavior) in our robot means that it's not OK for things to be "good enough" nor is it OK to work some of the time can slow progress even further for the average student making these last few meetings, truly, the dog days for us.
However, the members of 1414 are to be commended for how fast they are buying in, including our rather vigorous testing and iterating I have asked the team to put our arm/accumulator through.
On August 9, we cut, drilled, and fitted two polycarbonate sheets to the top and bottom of our accumulator, tying everything together neatly and keeping any game objects from falling out of our hold. Then came the tedious part as the polycarbonate was banging into a drive motor, was holding our entire manipulator outside of the 18" starting size, wasn't positioned well enough to direct objects into the 30" goal, and was digging into the field preventing movement of any kind. So, four interdependent variables led to a LOT of minor iterations, shigting of pieces, moving chassis rails, trimming and filing edges, etc. However, by the time we broke up for the day we were able to successfully "hand test" (not under power) a manipulator that fits, reaches, rests appropriately on a rail hard stop, and scores objects successfully in the 30" goal. WOOT! We also brainstormed, researched, and tentatively selected a robot name (we will share it when we are sure).
August 12, then was all about testing the arm and accumulator under power. BUT, before we could do that we discovered loose motors, a broken gear that needed replacing (caused by an alignment issue we believe we have fixed), and the fact that our foam attached to the treads has split in a few places (this didn't require any work, and we believe it is not a long term issue, but have to keep an eye out as we wear in the system. We also wound up learning a HUGE lesson on the effectiveness of using latex tubing as a spring assist for motors that lift. All of the details of our testing under power can be seen here:
Today we "finished" the basic mechanical portions of our accumulator and arm by solving two problems:
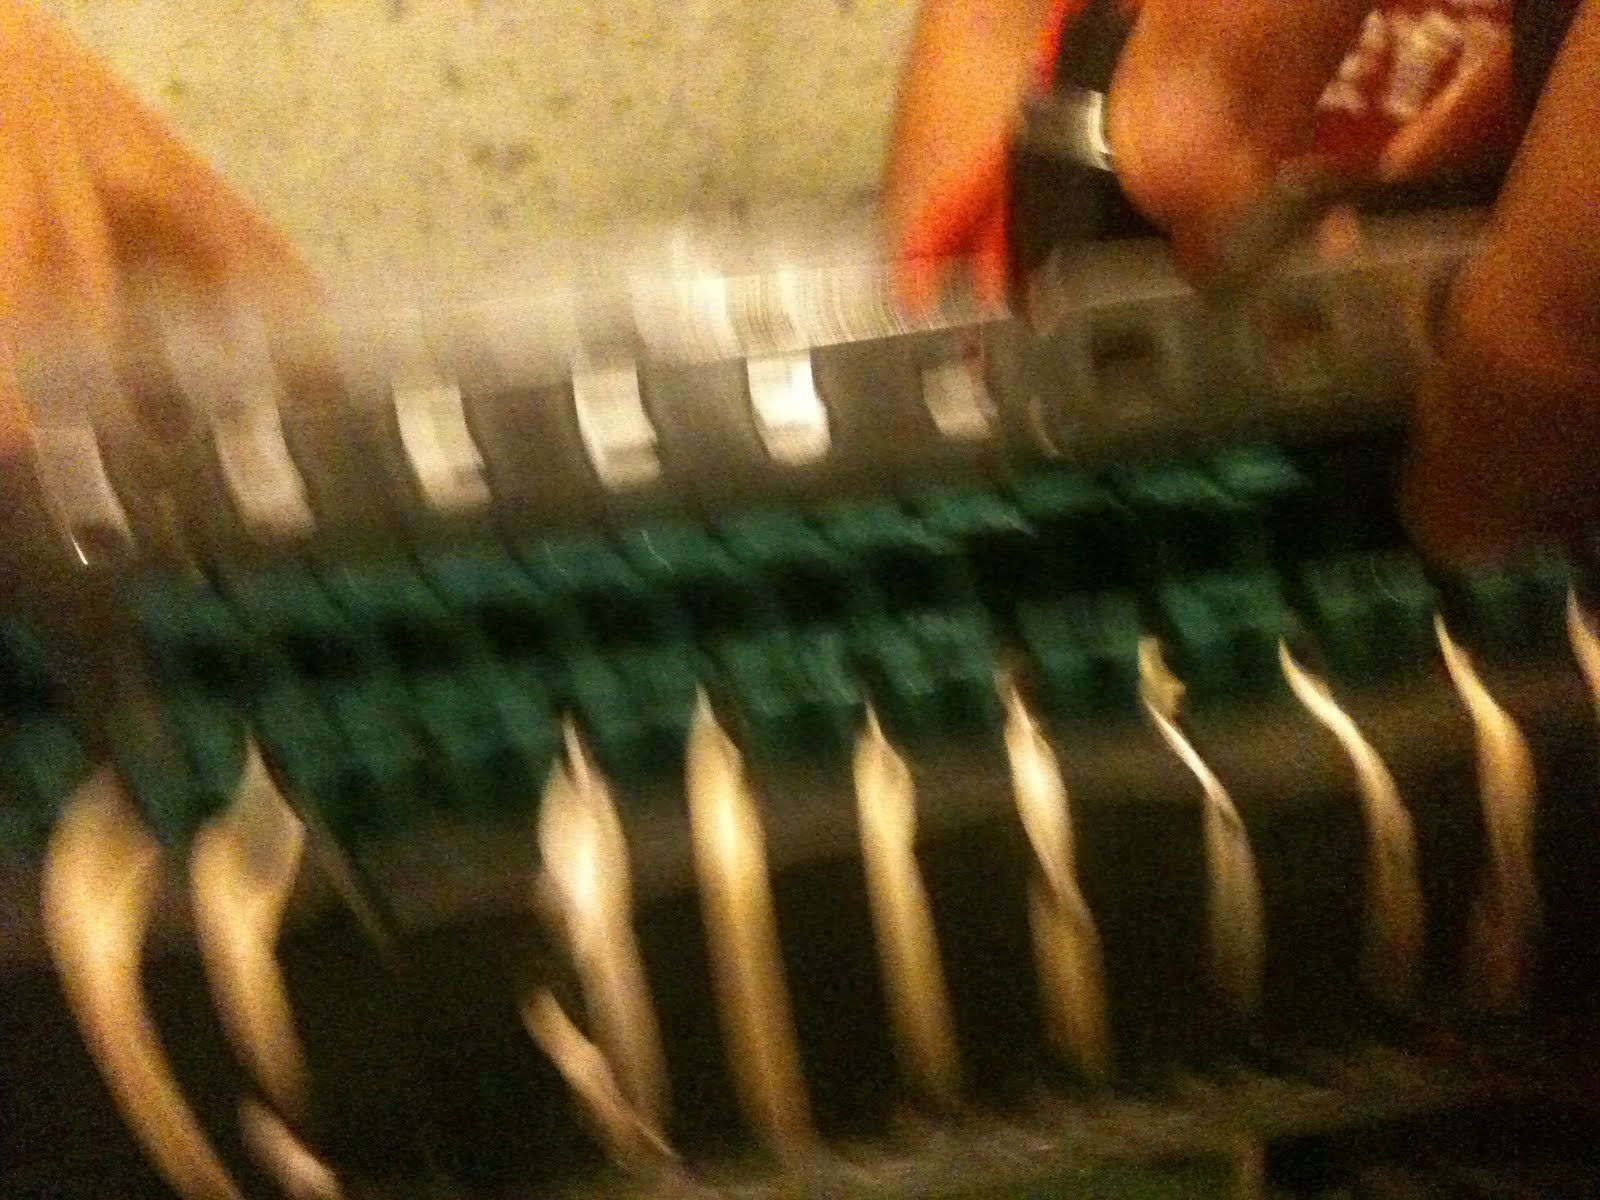
1. Increasing the coefficient of friction on our tread intake to maximize "grabbing power" for barrels and balls. To do this we covered our two tread lengths in adhesive backed VEX foam, "sewing" each together with a #32 rubber band and then weaving copious amounts of #32 rubber bands over the foam to attach it firmly to our tread system. We believe that this careful and inexpensive choice of materials will be a key to object manipulation for 1414.
2. Tying our two accumulator sides together into a single arm with a fixed intake width to cinsistently engage game pieces. We accoumplished this through the use of VEX threaded beams and cutting VEX metal to fit and fix our width. After 3 or so iterations, we're happy with these basic distances and will add some polycarbonate sheeting next meeting for rigidity and to ensure objects can't be dropped.
By meeting's end we were able to hand test the mechanism and we're very pleased thus far.. Look for more video and pics soon, but for now here's a few photos: